Setup Guide
A guide to setting up the development environment for the web-overlay project.
1. Visual Studio Installation
Download & Install
- Visit Visual Studio Downloads
- Download Visual Studio 2026 Community Edition (free)
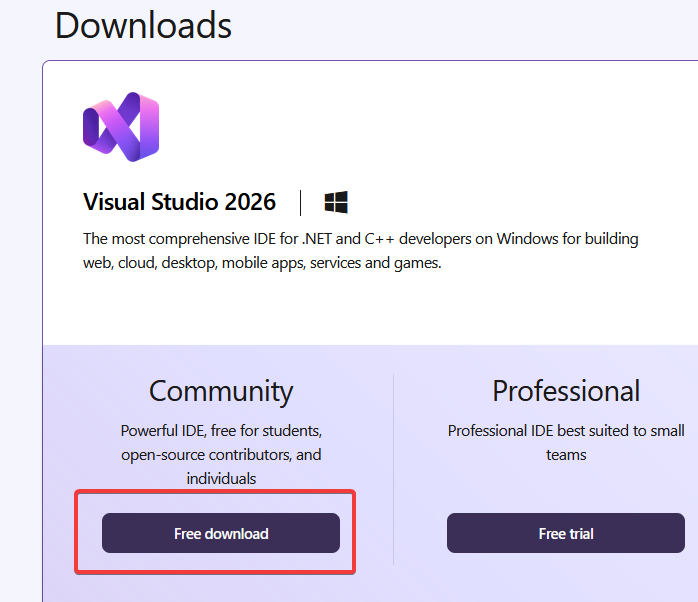
- Run the installer
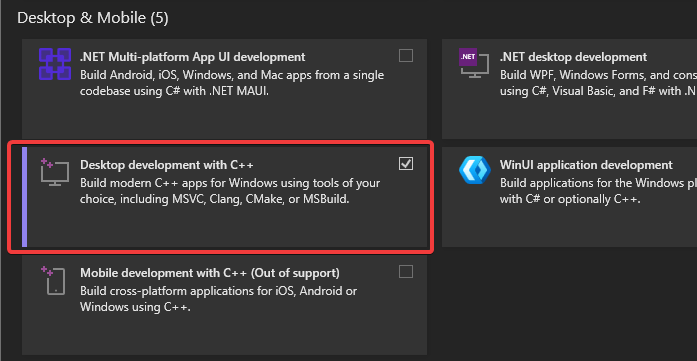
Configure Workload
- In the Visual Studio Installer, select "Desktop development with C++"
- Click Install and wait for completion (this usually takes over 15 minutes)
2. CMake Installation
- Visit CMake Downloads
- Download the Windows x64 Installer (
.msifile) - Run the installer
- Important: During installation, select "Add CMake to the system PATH for all users"
- Complete the installation
Verify Installation
Close any open terminals and open a new PowerShell window, then run:
cmake --versionYou should see the CMake version number.
3. Visual Studio Code Installation
- Visit VS Code Downloads
- Download and run the Windows installer
4. Ninja Build System
Open PowerShell and run:
winget install Ninja-build.NinjaVerify Installation
Close and reopen PowerShell, then run:
ninja --version5. Bun Installation
In PowerShell, run:
powershell -c "irm bun.sh/install.ps1 | iex"Verify Installation
Close and reopen PowerShell, then run:
bun --version6. Rust Installation
- Visit Rust Installation
- Download rustup-init.exe (X64)
- Run the installer and follow the prompts (default installation is recommended)
- Wait for the installation to complete
Verify Installation
Close and reopen PowerShell, then run:
rustc --version
cargo --version
7. Git Installation
In PowerShell, run:
winget install Git.GitConfigure Git (First Time Setup)
Close and reopen PowerShell, then configure your identity:
git config --global user.name "Your Name"
git config --global user.email "youremail@here.com"
Verify Installation
git --version8. Clone the Project
- Navigate to your desired project directory:
cd C:\repos # or wherever you want to store the project- Clone the repository:
git clone https://github.com/nopjo/web-overlay
cd web-overlay
9. Visual Studio Code Setup
- Open the project in VS Code:
code .-
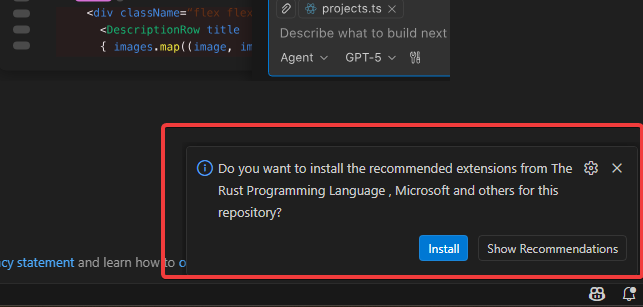
When prompted, install all recommended extensions. The project includes:
- C/C++ Extension Pack
- CMake Tools
- Rust Analyzer
- And other recommended extensions
-
If no notification pops up to install the recommended extensions you can go to the extensions icon on the left sidebar and it should show the suggested extensions there.
-
Wait for all extensions to install completely
10. Build the C++ Application
You have two options for building: Visual Studio Code (recommended) or Visual Studio IDE.
Option A: Build with Visual Studio Code (Recommended)
Configure CMake
- At the bottom of VS Code, look for the CMake status bar
- Click on the build configuration and select
X64-Release
Build the Project
- Click the Build button at the bottom status bar, or
- Press
F7, or - Open the Command Palette (
Ctrl+Shift+P) and run:CMake: Build
Option B: Build with Visual Studio IDE
- Open Visual Studio
- Select "Open a local folder"
- Navigate to your
src-cheatfolder and open it - Visual Studio will automatically detect the CMake project
- At the top, select x64-Release from the configuration dropdown
- Click Build → Build All or press
Ctrl+Shift+B
Expected Output
The build process should complete without errors. The executable will be located in:
src-cheat/out/x64-release/bin/web-overlay.exe11. Build the Tauri Frontend
Install Dependencies
Open the terminal in VS Code and run:
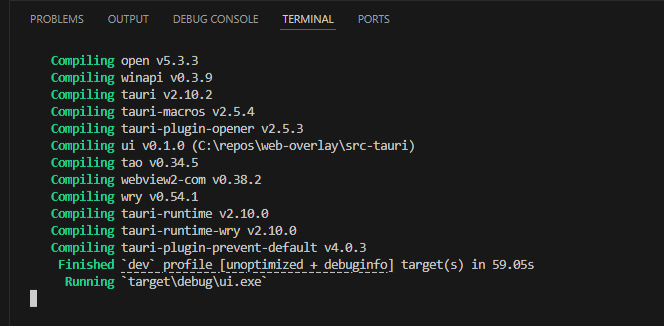
bun installTesting the UI
bun run tauri dev- It will take a while first time since it will be building all the Rust dependencies
- The UI will then be running. Follow the instructions below to actually test the overlay
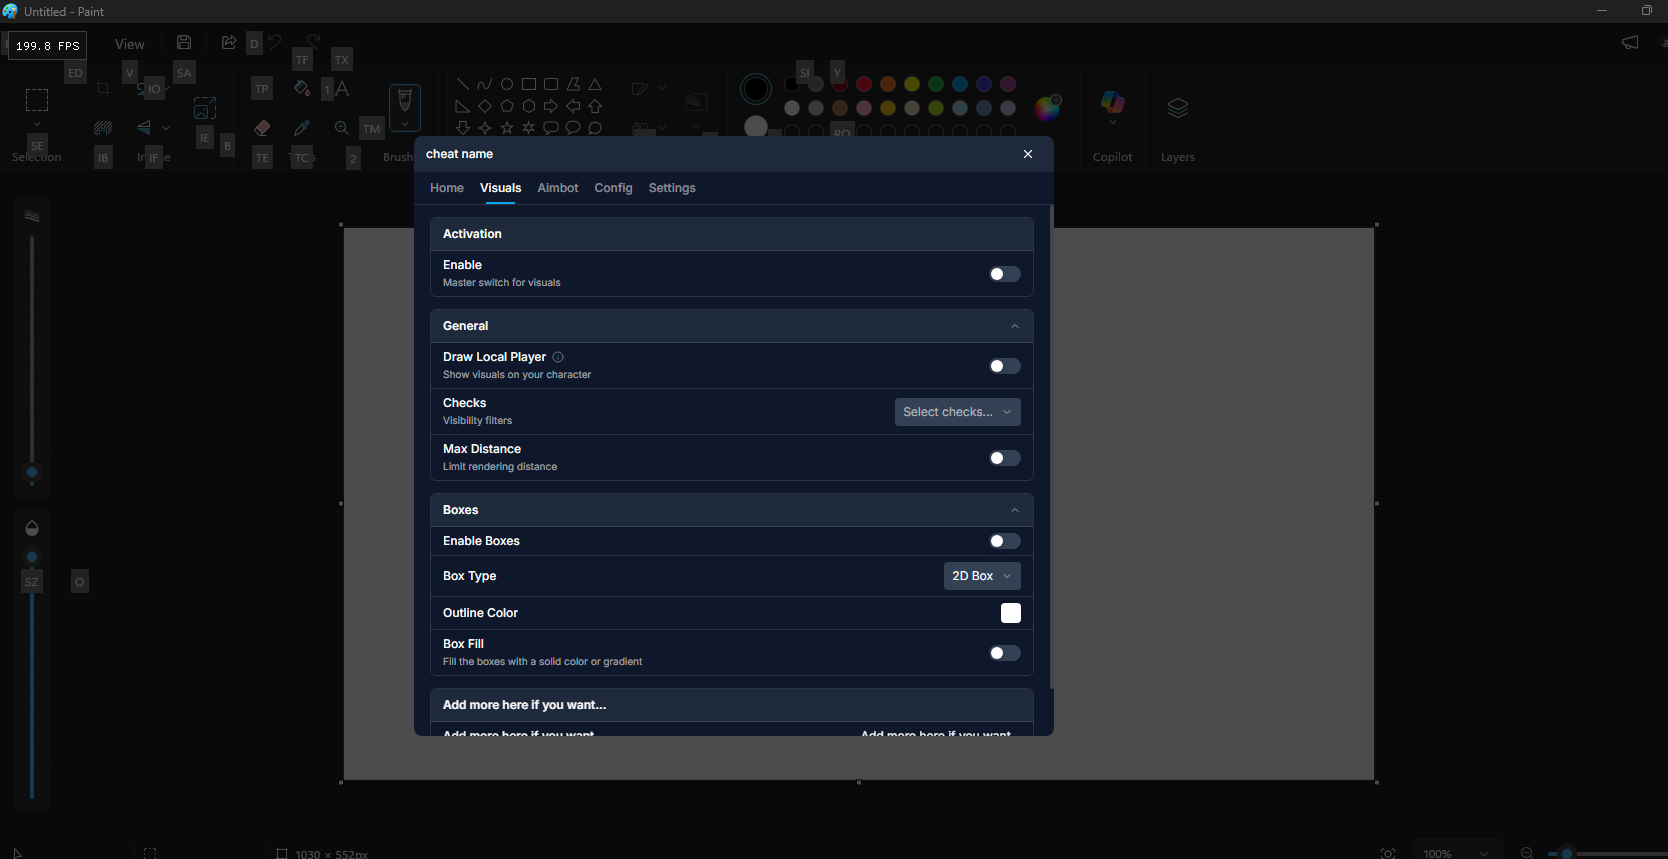
12. Testing the Overlay
Test with Paint
- Open Paint (Win+R, type
mspaint, press Enter) - Run the executable by pressing the play button at the bottom in Visual Studio Code or Press the run button in Visual Studio 2026
- The overlay should appear over Paint's window (default key to open menu is
Insert)
Need help? Open an issue on GitHub or contact me directly on Discord (jonahw / 315412038455132160)